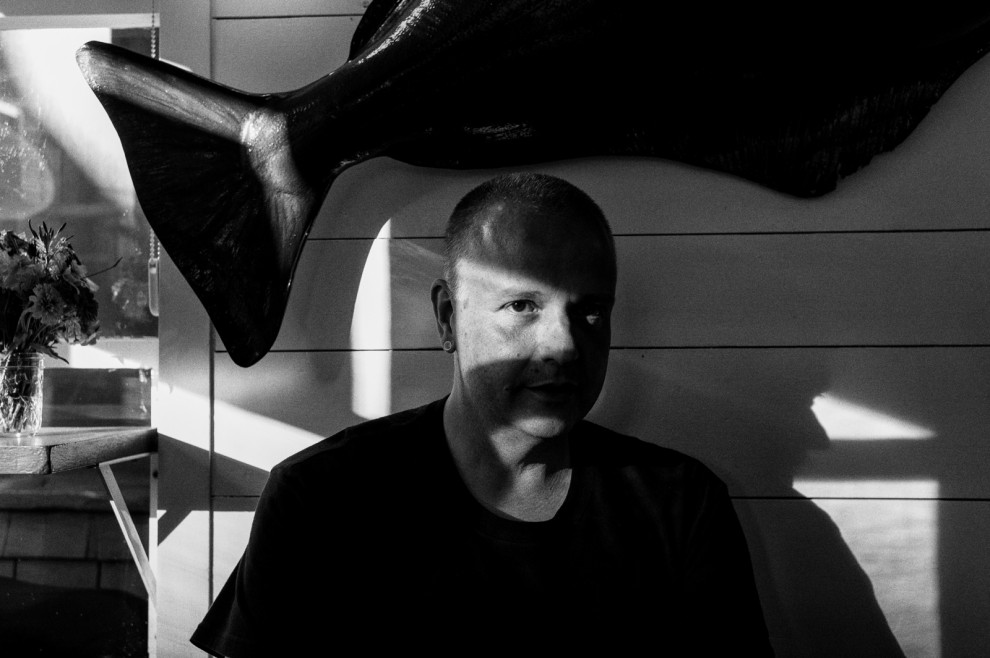
The popularity of modern digital cameras hasn’t removed our desire for classic looking monochrome images and converting to black and white is an artform unto itself. We take a look at Gary Tyson’s method for getting a dramatic analog look and see how it holds up in the real world. Hit the jump for video tutorial and sample pics.
Convert Color To Black And White
Gary’s method involves opening your file in Lightroom 5 and flattening the contrast of your color image before working on the file in Silver Efex Pro 2. The video specifically talks about converting files from a Fuji XT-1 but the method works fine with any camera – just fiddle with the settings a little bit to dial in the look for your particular camera.
The results are contrasty and dramatic and may not suit everyone’s taste but it’s can serve as a good starting point for your own personal black and white look.
1 – Create A Super Flat Version Of Your Image

Before working on your image in Silver Efex Pro 2, you’ll need to flatten the contrast. This step reminds me of the cine gamma in digital cinematography. By lowering the contrast you give the Silver Efex Pro 2 as much information as possible before “grading” your image back to the final look you prefer.
Gary uses the following settings in Lightroom to create the super-flat look:
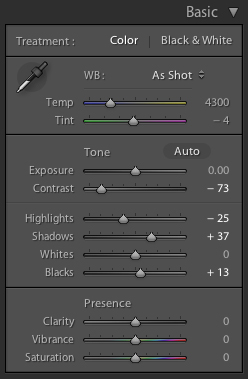
Remember, these settings are a starting point and you may need to adjust them to get the final look you like.
2 – Edit Image In Silver Efex Pro 2

Open your flattened image in Silver Efex Pro 2 and apply the Push Process (N+ 3.0) preset to kick the contrast back up. Then adjust the film type to Kodak 400 TMax Pro and save the file. Silver Efex Pro 2 will close and you’ll be able to add some finishing touches in Lightroom.
3 – Fine Tune The Contrast In Lightroom
Gary adds the following adjustments in Lightroom to give the black and white image a little more “kick”:
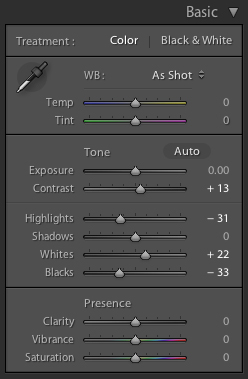
But again, this step is entirely based on how YOU want YOUR final image to look. Experiment with the controls and come up with the perfect look for your own images.
4 – The Final Black And White Image
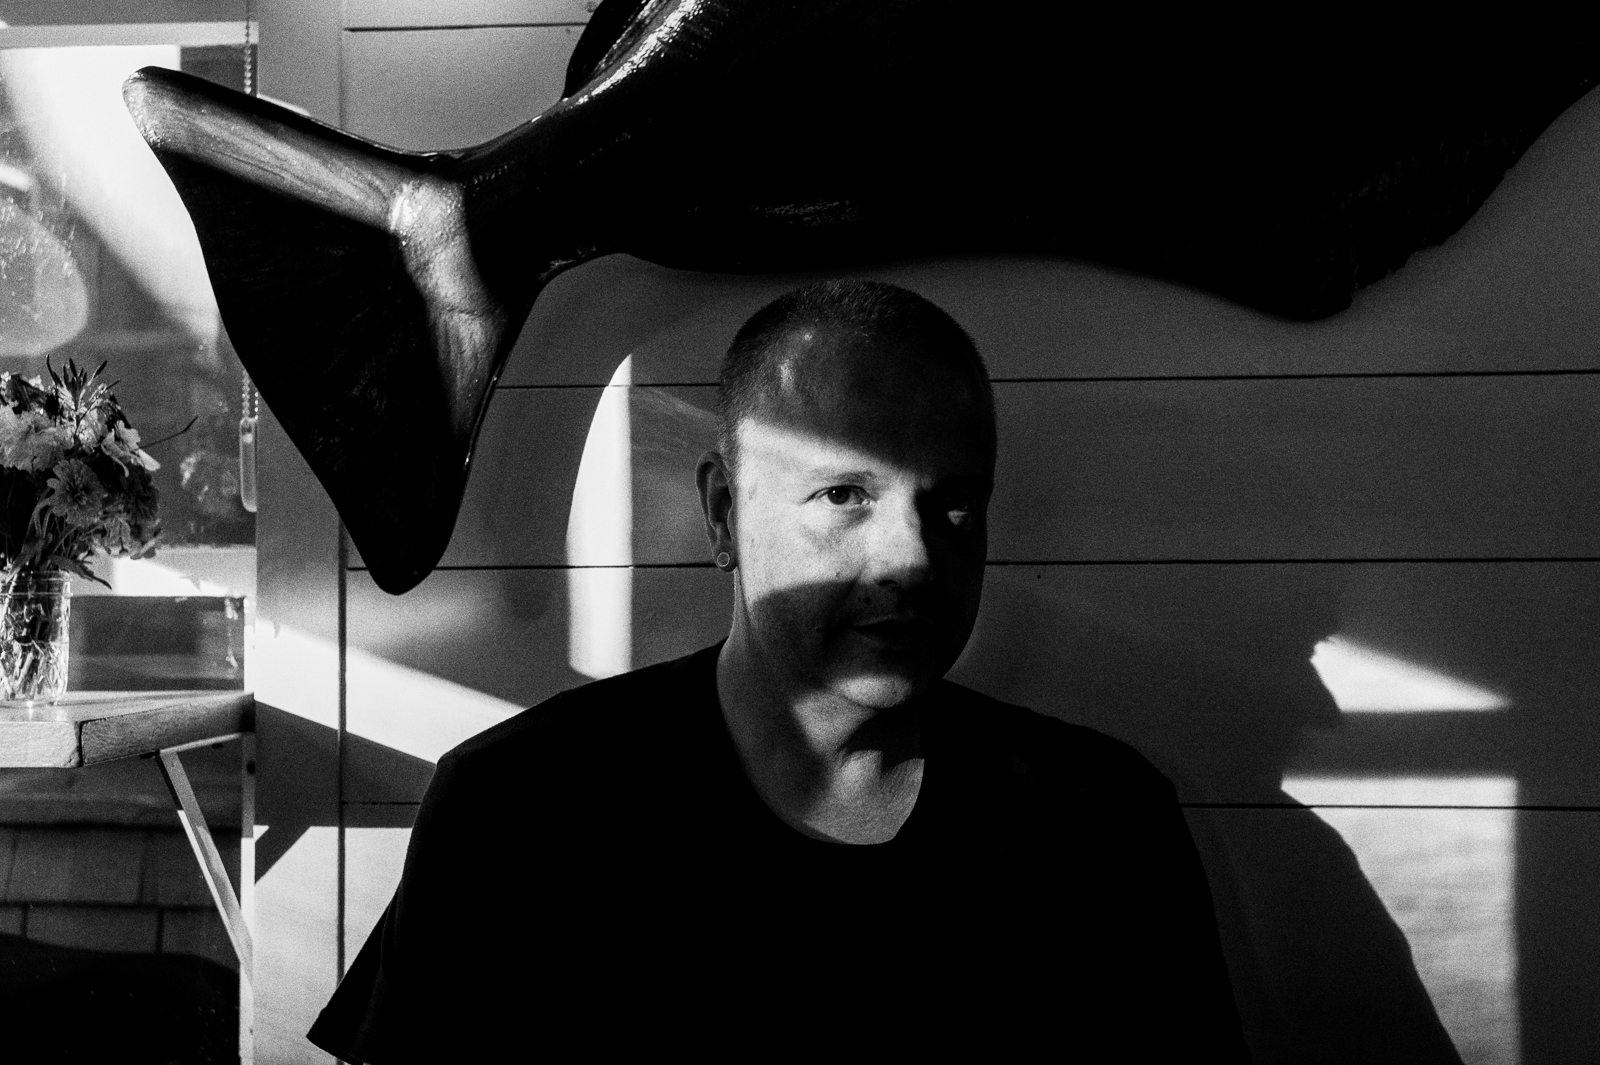
When you convert color to black and white using Gary’s method the final image is dramatic and stark with pronounced grain. The image is slightly compressed highlight enough shadow detail to keep it interesting. It’s definitely an unique look that may not be suited to every kind of photograph but you can’t deny that it looks pretty damn good!
The cornerstone of Gary’s method is applying a 3 stop push preset to the super flat image in Silver Efex Pro 2. This opens the hilights and creates a natural analog look that would be difficult to create otherwise. If you skip this step and simply apply the Kodak 400 TMax Pro film same image to Silver Efex Pro 2 out of camera (without the super flat profile) and apply the Kodak 400 TMax Pro film preset you end up with something like this:
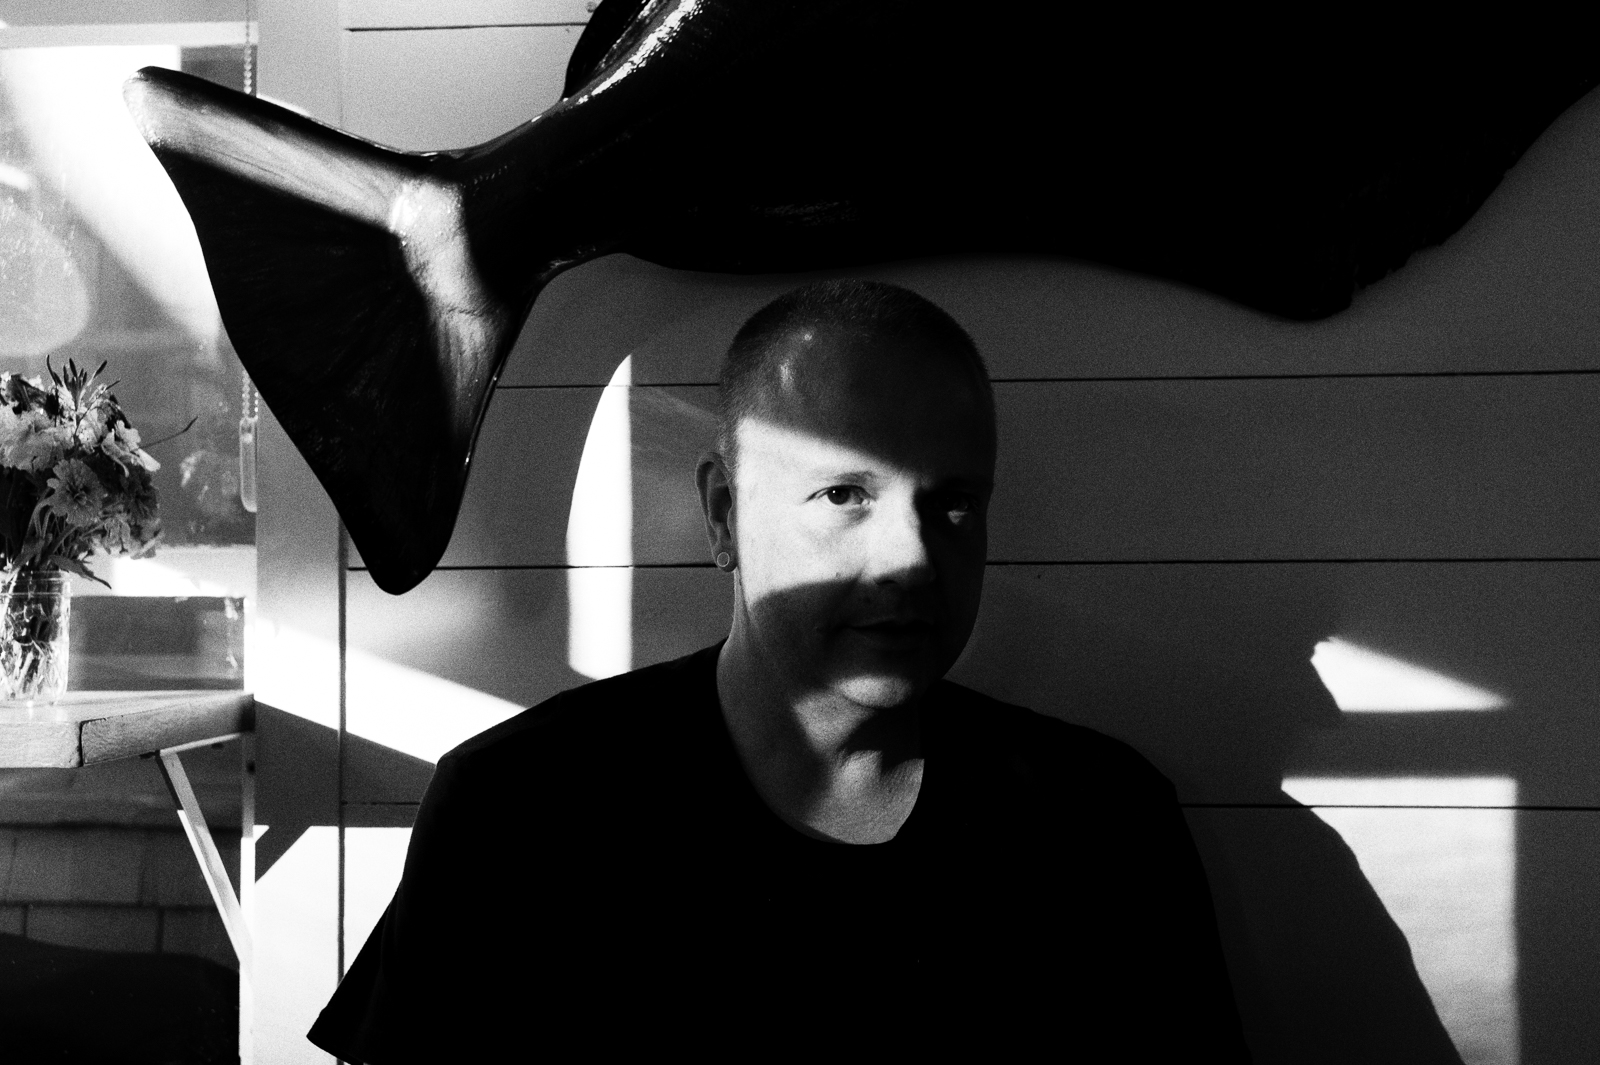
The resulting image has that flat, precise and digital look that makes many film shooters scratch their heads. Gary’s technique is clearly superior and can be adapted for a wide variety of shooting styles.
StreetShootr’s Take
I felt that the final look was interesting but preferred to tone it down “just a bit”. I set the film type to Tri-X instead of TMax and adjusted the settings in Lightroom until I ended up with something that looked like this:
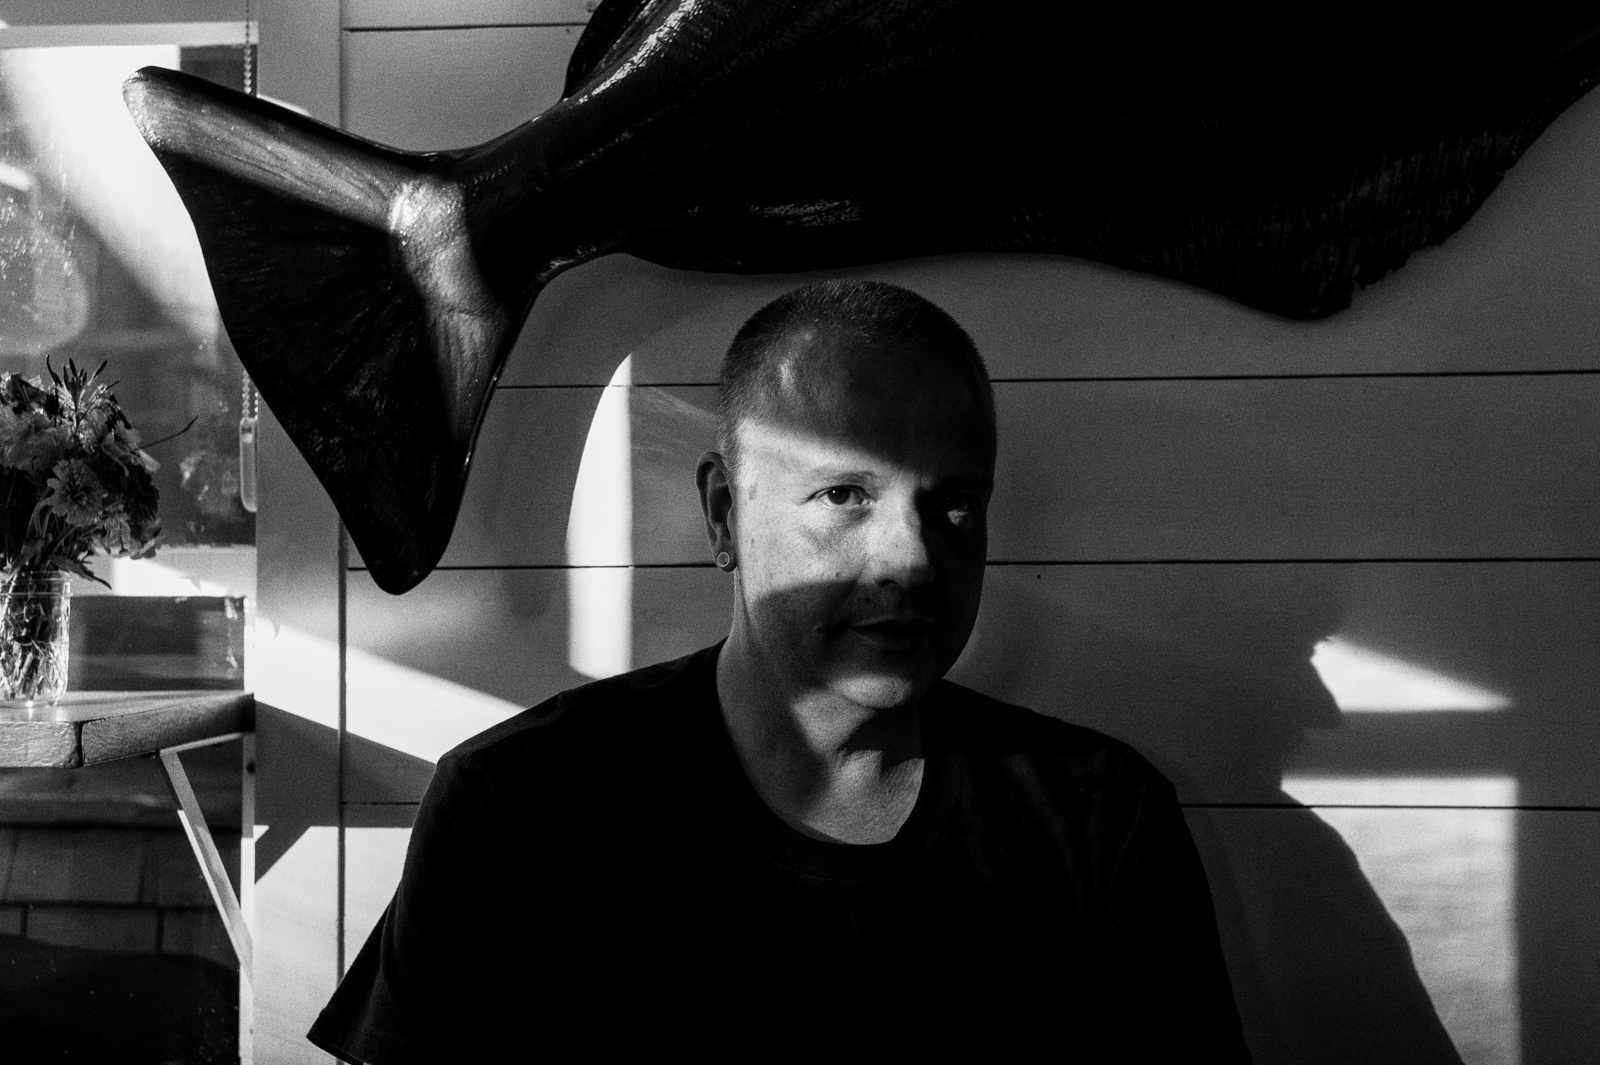
The image keeps dramatic analog feeling that Gary’s method produces but has a touch more detail in the midtones. I shot Tri-X all through school and remember it fondly for its rich silvery midtones. I feel this image hints at this quality and with a bit more tinkering I could get closer to that classic “Tri-X feel”.
Will digital ever be able to exactly duplicate film? So far I haven’t seen it. But Gary’s technique is solid method to create dramatic black and white images with a decidedly analog feel.
What do you guys think of this method to convert color to black and white in Lightroom? Post your comments down below and keep the conversation going!

